Today I'm sharing a tutorial I've created for the Poinsettia. I know many of you are also teachers, so this is a great & beautiful way to dec your classroom or other places with your students' work. I have to say, I REALLY WISH I had a video tut for ya, because it was so hard to try to explain a couple of the steps. If anything is clear as mud, just let me know OK? :) I've asked Santa DH to get me a good camcorder for Christmas, so *hopefully* he will. I have to be very explicit or else he'll gift me size 5 1/2 shoes when I actually wear 7 1/2! (Seriously, this happened!!) So, how about we get started!
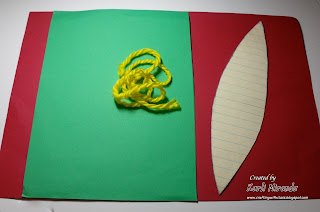
Here's what you'll need:
1 sheet red construction paper (12" x 18") half sheet green construction paper
Yellow school yarn
My pattern :)
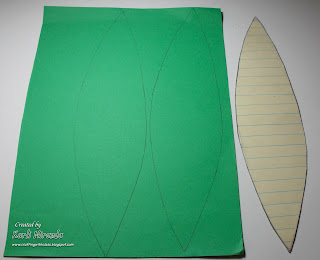
Trace the pattern 2 times on the green paper and 5 times on the red paper
(Feel free to use less or more)
Cut them out.
With your fingers, pinch the middles of each of the red petals. (This step will make it easier to assemble)
Now gather the petals one at a time and place them right next to each other. Hold them with your fingers. For kids with poor small motor skills, give them a clothespin or help them with this part.
Tie a knot to secure.
Next, alternate between the 2 ends and pull it across to the other side. So you take one end, up one side (in between 2 petals), over the top, across between 2 petals (on the other side). Repeat the process until you have put the yarn between all the petals.
When complete, the front will look like this:
Here's the back:
Tie the remaining ends into a tight knot to secure.
Next, punch a hole through the center of the leaves and thread the yarn through the hole.
Tie a bow to secure or you can also tape the ends down. Trim the excess yarn.
Spread the leaves & your poinsettia is complete!
Here it is! Now it's ready to be hung :)
In my class, we make some to decorate the cafetorium for the Winter Program and some to dec the classroom. They're just beautiful IRL. My third graders do everything themselves except for winding the yarn to create the middle of the poinsettia. That part is a bit hard, but I let them try. If they have a hard time, I do that part for them.
On the last day of school (before winter break), we tape them to the top of the present they take home to their families. It looks like a big, beautiful bow.
Like the Terminator, I'll be back---> tomorrow with a tut for a card-sized poinsettia.
Thanks for peekin' today! I hope you & your kiddos give it a try & you let me know how it turned out. You will not be disappointed :)
Gotta go!

Here's the template for you to download & use. I would recommend you print it out & trace onto index paper & make several templates. Enjoy!
Poinsettia Pattern


Karli,
ReplyDeleteNeat poinsettias. I nominated you for a Kreativ Blogger Award. You may pick it up here:
http://craftingwithprincesslisa.blogspot.com/2009/12/kreativ-blogger-award.html
This is a gorgeous project. I love your great projects!
ReplyDeleteThank you this is so lovely. Will be ideal as a home decoration. My daughter and I do a lot of our crafting together and this is something She is also sure to enjoy. Thanks for sharing.
ReplyDeleteCheers from Bangalore ,India
Dr Sonia S V
ENT Surgeon and Avid Crafter
http://cardsandschoolprojects.blogspot.com