Showing posts with label YMH Designs. Show all posts

Wednesday, May 18, 2011

ABC Challenge: U is for...

UNUSUAL Folds!

Howdy friends,
Welcome to a brand new challenge at ABC Challenges! This week the challenge, should you accept it, is unusual folds. This is a great challenge because now those of us who stick to the basic card form get the chance to step out of our comfort zone & create something different. I chose to go with a card style I've long admired but was very intimidated by---> The Tri-Fold Shutter card.
Here's my card: closed
 opened:
I couldn't believe how super simple it was to make. Seriously, I felt like such a fool for being afraid for so long cuz it's an AMAZING card style!
Here are a few more peeks & then come the deets :)

flattened out on the table
 stretched out view from the top
What i love about it is even though it stretches out to 12 inches, it closes to A4 size! (4 1/4" x 5 1/2")
This is a wedding card. I used some papers from one of my fav BasicGrey collections---> Cappella. I embellished it simply with some Prima flowers from YMH and my Viva Decor pen.

You will definitely be seeing more of these type of cards from me, let me tell ya! It's so easy, but fabulous!  It took longer to cut the layers than to create the card. Is there a particular card style that you've put the brakes on? Join us this week & just do it! Do it afraid like I did & you might surprise yourself ;) You've got til next Monday to Linky your card creation to the ABC Challenge blog & possibly be awarded a spot in the Top 5 or be the winner of the fabbie prize offered by our sponsor:
Whiff of Joy! Woo hoo!

You can find a wonderful tut on the tri-shutter card at SCS---> Here.
Thanks so much for peeking!
Gotta go!

Friday, January 21, 2011

DT: Good Intentions

Howdy friends,
Today I have a card I had every intention of making a CAS (Clean & Simple) card but... I just couldn't stop adding embellies :(
Here's my card:
 I think this card has a shabby chic feel to it, which I don't do very often :)

I used papers from the Santa/Sweet Season collection from Webster's Pages. It's "supposed" to be Christmas paper but I ask you: Does this look like a Christmas card???  You could easily use most of the papers in a non-Christmas sort of way. Anyhoo, this is a beautiful collection & if you know Webster's pages, you know what I'm talking about :) I used my Beaded Ovals Nesties to cut out the oval. I punched holes around it & threaded some ribbon through them. Then I added some Prima roses & pearls. The sentiment reads: "May you always have Love to share, Health to spare, & Friends that care."
Here's a closer peek of that:

And here's a peek of the innies:
I cut out one side of the cover page where all the paper info is printed I adhered it to create a side border for the card innies. It was much too pretty to just throw out. To finish, I did some stitching around all the edges- faux for me. Like I said, I tried to go CAS but it just is my kryptonite :( ah well... I'll keep trying...

You can find all the goodies for this card at the YMH store---> Here. While you're there, check out all the new, fab goodies Prima is releasing in time for CHA!

Thanks for peeking today!
Gotta Go!

Friday, January 14, 2011

DT: TA Ribbon Bath Tut

Hi friends,
Do you have Glimmer Mist & want to die your ribbons to match the color but don't like messy, inky fingers :( Well, today I thought I'd share the way I dye my ribbon using Tattered Angels Glimmer Mist. I thought I'd make a little tut for ya.
Here we go:
 You'll need a sandwich baggie, ribbon of your choice, & glimmer mist.

                                                  Spray some glimmer mist in the bag

 Add your ribbon & seal the bag WELL. Make sure it's sealed (with a kiss if you want ;)

   Work the ribbon with your fingers (on the outside of the bag) so it's absorbing the glimmer mist.
   Add more dye until you reach the desired color.

 Then you're ready to remove the ribbon from the bag & lay it flat on a protected surface.

 Let it dry or if you're as impatient as I am, use your heat tool :) Remember to use a heat-resistant mat or surface.

 Here it is dry & ready to use! You can see what I started with & the color I achieved. It will lighten a bit once it dries. But best of all, there's not a drop of glimmer mist on my hands! Dang, I should have taken a pic of that :(

Easy peasy! So what did I do with that ribbon trim?
This:
I made a simple little card :) I also sprayed the Prima Flower with Glimmer Mist as well, used pink satin ribbon for the ribbon ruffle, & stamped "Be Mine" to make a border. This card was a total CAS card for me!

You can find loads of yummy Tattered Angels Glimmer Mist colors, Prima flowers, & the Bella lace trim I used for my card (& others) at the YMH Store.

Thanks for peeking today & I hope this tut was helpful :)
Gotta Go!

Friday, December 10, 2010

YMH Holiday Hop

Happy Friday Friends!
Today is the day for YMH's first Handmade Holiday Hop!
 Hope you've hopped from the uber fab Jess's blog, but if not, no worries, you can start at the YMH Design blog so you don't miss any gift ideas.

The YMH designers have created some handmade gift ideas just in time for this holiday season! Before I share my project with you, I wanted to reveal the FAAAAAAB prize package one lucky friend can win.
Here it is:
 Wowzers! Look at all that bloggy goodness!!!
The deets (cuz I know ya want them ;) This prize package includes:
Snow Fun kit from Pebbles
Set of Pebbles Chalks
Pebbles Chalk Eraser tool
Cuttlebug Embossing folder
Prima Glistening Vines
Prima Poinsettia
Prima Jenuine Collection tissue/crochet flowers
Prima Say it in Studs and Pearls embellishments
Imaginsice Snowy Jo Stocking stamp set
Imaginsice Snowy Jo Happy Holiday stamp set
Imaginisce Snowy Jo Believe stamp set
Webster's Pages Petite Papers Waiting for Santa/ Sweet Season combo pad
Tattered Angels Glimmer Glaze in Champagne

But WAIT there's more! For another chance to win a special surprise item, visit our Facebook Fan page and "like" us, then post a comment (like: "Karli sent me from the blog hop" or "I found you on the Handmade Holiday gift hop") to be entered to win.


But because you know I like things that come in 3s- I'm also adding to the blog candy goodness with my own "My Favorite Things" Surprise package!  
Move over Oprah cuz this is the crafter's edition! Phew! That's a lot of bloggy goodness!  

So now on to my project....
I wanted to create an easy, inexpensive, but fitting for the holidays gift. I actually came up with 3 different versions (see how I like 3 ;) An easy version, a version that takes more work but has individual pockets, and a Cricut version- where I used my Cricut for most of it. I thought I'd share the easy version today. 
Here's what I came up with:
 and here are the innies:
 This gift package includes a hot chocolate packet (Caramel Chocolate, if you must know;),  a baggie of mini marshmallows, and my world famous, award-winning, culinary fabulosity known as---> my pumpkin chocolate chip cookie! Little piece of heaven, I tell ya!

Here's how everything fits in the package:
 And a side view:
To create the elegant look for this project, I used the Windsor Collection from SEI. The gold foil gives it that look of elegance, I think :) I wrapped gold ribbon around the box, tied a bow & added a Prima flower I sprayed with Irridescent Gold glimmer mist. It gives it this beautiful gold sheen. All of these can be found at the YMH Store, of course!
 
The inspiration for this box came from a beautifully wrapped $80 box of Godiva chocolates I saw at the mall. I decided to recreate the look of the box without the $80 price tag. This box will cost a sliver of a fraction to make and you made it yourself in minutes!


Yes, I see a hand in the back.
Q: Will I provide a tutorial?
Why yes, of course!
Another hand...
Q: Will I show the other 2 versions?
By all means! So be sure to peek back for the tut & the other versions later :)

Soooooo... be sure to leave a comment on my blog, the rest of the DT, and YMH for your chance to win some blog candy goodness! You've got til Sunday to play along :)

Hope you liked my gift idea :) Now, I'm going to lead you to the Creatively Fabulous Kim's blog for her great gift idea!
Thanks for hopping by!

Sunday, December 5, 2010

Coming Soon...

Hi friends,

Are you looking for some Handmade Holiday Gift Ideas??? Then you're in luck! YMH will have it's very first Blog Hop featuring some fab ideas for uber cute gifts created by the Design Team members :) The fun will begin this Friday, December 10th at the YMH design team blog ---> Here. Did I mention there's candy involved... :)
Stay tuned for more deets!

Friday, November 26, 2010

Snow

Hi ya friends,
Hope you've recovered from an evening of stuffing & a day of shopping! I was not in your way today- I don't do crowds or lines- I do SLEEP! It's called beauty sleep for a reason ;) and it takes sleep, not Botox, to keep me the fairest of them all! Tee Hee!  Hope you found some sweet sales :)

So, do you have 10 minutes? Want to make a seriously simple scrapbook page that doesn't look like you spent 10 minutes on it. Well, step right up & take a peek at this:
 sorry, I couldn't take a better pic :(
To create this quick & easy page, all I did was use my Cricut (on my Gypsy) to cut the snowflake from the "When it's Cold Outside" cart. (Did you notice the snowflake is made up of little reindeer heads???) It went *perfectly* with the reindeer on the SEI Paper. I cut a mat layer for a pic added some Stickles and pearls to the snowflake and on the end of each reindeer, I added a red bling nose. Super easy peasy! Yaaaay!
Here's a closer peek of the reindeer snowflake:
Sooooo... much like I tell the good peeps at In-N-Out burgers---> make mine a double! My brain is telling me I need to make this into a double page spread. I've got the deets in my head so now I need to find a few minutes to put it down on paper. I'll probably be adding a pic of my boys- the biggest FLAKES I know! Hee! Hee!


My Cricut and the gorgeous SEI paper, made this project so easy to do. All the embellies can be found at the YMH store. Be sure to check out the Prima kits on sale too!

Thanks for peeking today! I'm off to get more of my grammy's stuffing! luuuuv it!
Gotta Go!

Friday, November 12, 2010

DT: Bonjour Birdie

Hi ya friends,
Today I've got a Scrapbook page I created using lots of goodies from Your Memories Here. 
Here it is:
 I've been admiring the T!m Holtz birdcage die but have been refusing to buy it because I have several awesome Cricut carts with birdcage images. Finally, I decided to make it happen.

Here's a closer peek at the birdcage & the beautiful Prima flowers I used to embellish. I used the Serenade Cart for the cage & Home Décor for the bird. I used my neglected Pebbles Inc Shimmer chalks to color the bird- easy peasy. To distress the cage a bit, I sprayed it with Tattered Angels Glimmer Mist in Garden Fairy & Sage then added some pearls to embellish.

 I LUUUUUUV this Prima alabaster flower. I sprayed it with Dazzling Diamonds & Irridescent Gold Tattered Angels Glimmer Mist for a beautiful effect- so wish you could see it :(

This is another peek.

And one last angle :)
Did I use my Gypsy?  But of course!!! Oh, this page is mat ready for a 4 x 6 pic. I used a piece of Oopsie Daisy DP from imaginisce. The sentiment "Bonjour" is from the Ashlyn's Alphabet cart sprayed with TA glimmer mist too. The Swirly border DP is Breeze Specialty Die Cut paper which creates a perfect border accent. Don't ya think? One last detail... see the white stitching along the border? Well, it's faux... SNOW! Hee! Hee! I used my snow pen to faux stitch around the edges, then took my heat gun to make it 3D & look like real stitches. I know, I'm a sneaky one ;)

All these goodies can be found at the YMH Store ---> HERE.
Thanks for peeking today!
Next stop, cookie recipe book :)
Gotta Go!

Friday, November 5, 2010

Need a Quickie?

Hi ya friends!
Hope you're all well. I want to start by apologizing for my absence from my blog and especially for not visiting my blog friends out there lately :( It's been crazy busy on the homefront which has left me with little time to craft & visit with you :( Trust me it's totally bummed me out. But because my job fully funds my habit, I'm afraid I have to put it high on the priority list. Then, my boys have had sports & projects of their own that I needed to help them with. Emphasis on the "I" cuz my hubby has allergies---> apparently to school projects... grrr :{
Well, I'm here to share one quick project. Actually it's a prototype of sorts. My friend is participating in a craft fair & she asked me if I could create a quick & easy (& cheap) card set to sell. So I limited myself to 30 minutes & this is what I created:
 It's a set of 4 cards & a matching card box (A2-standard card size)

Here's the box:
Here are the cards inside:

 And the individual cards:
I kept it very simple by letting the beautiful Mimosa paper do all the work. What makes this quick & easy is that there's no stamping or coloring- just cutting & adhering. I wrapped some ribbon I had from my stash & punched out some butterflies. I sprayed them with Tattered Angels Glimmer mist to coordinate with the colors of the paper. Done!

I don't know if she's going to use it or how much she will charge, but it's good to know I can complete something in 30 minutes or less. Cuz it sure isn't a Rachael Ray 30 minute meal! Hee! Hee!  You can find all the goodies for this project at YMH Store---> HERE.
And the tut for the card box ---> Here.
I'm off for now.
Thanks for peeking!

Friday, October 15, 2010

DT Post- Surprise Box

Hi there friends,
I wanted to share a little something I made for a friend's daughter. Hannah started Kindergarten this year & has been having a hard time adjusting to life as a kindergartener. I thought about making this little surprise/treat box for when she has good days at school. Her teacher created a behavior chart to let her mom know about Hannah's day at school and when she has a day with 3 stars, she can pull out a treat from this box.
Here it is:
 (sorry for the weird angle of this pic. The medallion is centered & straight IRL!)
So, if Hannah has a good day, she gets to put her hand into the hole at the top & pull out a treat.
 Here's how I made it:
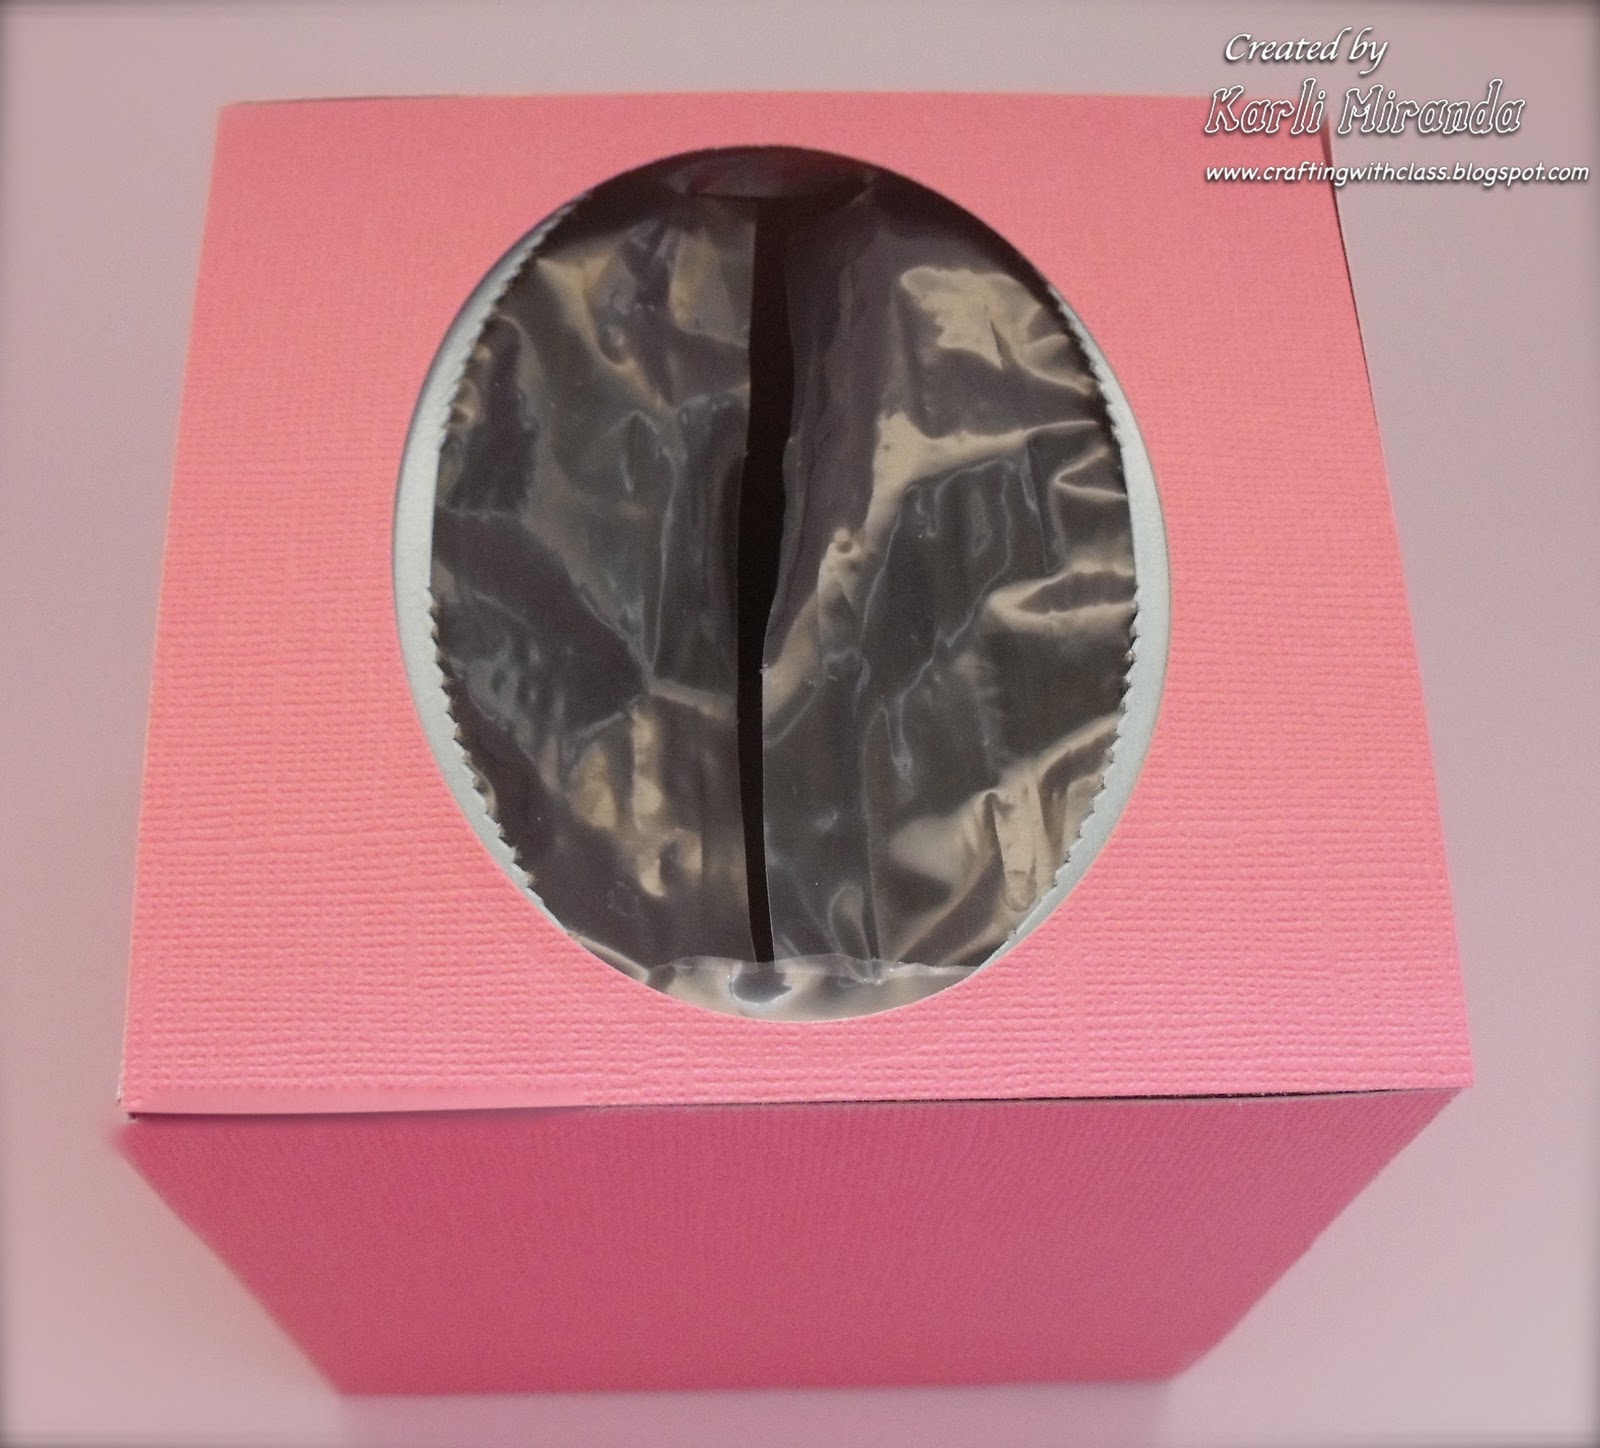
1) Start with an empty tissue box. The opening is a perfect size for little hands to reach in & grab a treat!

 2) Cover the box with cardstock. I used my largest oval Nesties to create the opening:

 Adhere the top piece on. Notice that it wasn't exactly a perfect match :(

So I punched out a few flowers to hide that slight imperfection & embellish the top of the box :)  Ahhhhh, and all is well in the world once again!

 Now to add some fun pattern paper to all 4 sides. This is Oopsie Daisy from Imaginisce.

Then I just added an accordian fold strip to the left over piece I cut out with my oval Nesties & popped up "You Did It!" I cut that out on my Cricut at 5" with the Wild Card Cart. I dotted the "i's" with some Prima crystals.

 and that's it! A fun & easy little treat box to reward a good day at school.
Here's the finished box one more time:
Thanks so much for peeking! All the supplies for this quick little project can be found at the YMH store---> HERE.

See ya soon!
Blog Widget by LinkWithin