Friday, July 31, 2009

Organization: Embossing folders

Hi friends,
Today I want to share how I organize my embossing folders. I luuuuuv embossing & these folders make it
quick & easy to do! I have a few ;) so let's get on with the deets:

I began with a bare wooden box I got from Michaels for around $3 (with coupon.)

I painted it white & then added Tim Holtz Distress Crackle paint on some of the surfaces to give it that look of "I've had this for years." (It looks soooo cool!) I didn't want to do anything else to it-- just kept it clean & simple.
A little closer look:
I took inspiration from my SU! Swatch Book


to create a swatch book of my embossing folders.

I punched them out on white CS ('cause I've got loads of it & you can see the embossing really well on white.) & put them on an O-ring. The swatches are numbered & correspond with the number on each folder. (It is very helpful to also write the name of the folder.)
I printed the numbers on clear labels so the number was visible, but didn't block out any of the pattern. (I simply wrote it on the card before embossing.)


Another plus of having swatches is that I can see (at a glance) all the patterns I have & can easily choose the one I want. I also get to see the embossed & the debossed side as well. The numbering system makes it very simple to both find & put away folders.


As you can see, it all fits nicely into this little box.
As I get more folders I add the next number label & swatch and add it to my stash.

Now I have a little surprise for ya :) Here's a sneak peek at the new Cuttlebug Embossing folders being released. (click on the pic to see greater detail.)They are: 30.Victoria, 31.Fleur de Lis, 32.Morrocan Screen, 33.Diamond Plate, 34.Harlequin, 35.Herringbone, & 36.Stars.


These are the folders for a full A2 card. They are: (top)Flourished Frame, (left)Celtic Knot, (mid)Journaling Card, & (Rt)Owl Flourish.

Aren't they awesome!! I was so excited to see all these great designs! Seriously, it's so hard to pick a favorite one. Be on the lookout for these and they are available for pre-order at many online stores.

I hope this inspires you to think of ways to maximize organization of your toys. Thanks so much for taking a peek! We're going to the Bay Area for a few days & I've gotta get everyone packed up --- Gotta go!


Edited To Add: To answer a few questions...
YES! The new 5 x 7 embossing folders will fit in this box. They stick up a little out of the top, but since there's no lid, there's no problem :)

This box is in the wood crafts section of Michael's next to the recipe card, & file folder boxes. They're $5.99 each. (but I used a coupon :)

Thursday, July 30, 2009

Space Case: MOJO97

Hi friends,
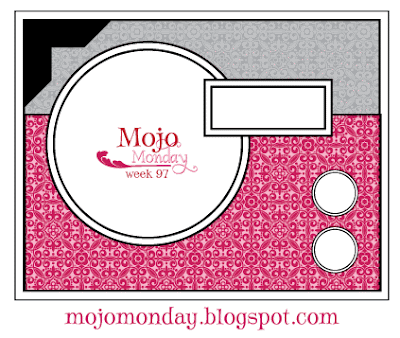
Here's the card I made for this week's MOJO97 Sketch Challenge. Well, let's see... last week I made a sun from the circle element-->here<-- & this week there's another circle element so it would be fitting to make a ... Moon!
*sorry for the lighting on this pic--I just couldn't get it right :(

I cut the circles out with my Nesties & ran them through my polka dots embossing folder to create the look of craters. I used shimmer white paper so it looks shimmery IRL- cool effect! The little space ship is a punch, & the buttons look like little space ships from the side. I DID use two different patterned papers, but they coordinate a little too well-- because it's hard to tell there's 2 different ones! I also faux stitched around the sides & added dew drops on the photo corners. Well, if there's another circle as the main element in the next sketch challenge, I've got some planets to choose from! Hee!Hee!

Thanks for peeking at my card. Hope your day is out of this world!--- Gotta go!


The 411
Stamps: Everyday Button Bits-PTI
Paper: Hello Space Boy- Prima, green, blue, black- Bazzill, Shimmer White CS- PTI, white CS
Ink: Versafine black, Wild Wasabi- SU!
Other: Buttons- PTI, Photo corner punch-SU!, Dew Drops, Rocket Punch- Martha Stewart, black hemp cord, Lg & Sm Circle Nestabilities- Spellbinders

Wednesday, July 29, 2009

Teacher Anya- that's me!

Hi friends,
Today I have a card for the first challenge from The Sweet Dreamers Bloggers. Our challenge was to create a card that showed what we liked using our favorite color, as a getting to know you. So, here's what I created:


You know I'm a 3rd Grade teacher. I'll be starting year 14 at Hogwarts-- OK, not actually Hogwarts, but there are always lots of adventures that go on at my school! After all these years, I still enjoy it (on most days- wink ;)

My Anya is wearing purple because it's my fav color. The chalkboard lists my favorite things:
1. Hello Kitty (what's not to love- hello!)
2. Cooking- not cleaning up! I love food so I enjoy cooking. I have been trying Rachel Ray's 365 meals cookbook & although her recipes require a lot of ingredients, the food is soooooo delicious! It does take me an hour & a half to make a 30 minute meal for some reason!
3. Reading, especially in the horror/suspense genre. I'm currently working on Angels & Demons- which I'm enjoying.
4. Watching horror/suspense movies- I think I'm a bit of an adrenaline junkie!
5. Hangin' with family & friends doing all of the above with them.

Thanks so much for peekin' today & for letting me share a little more about myself. Why don't you follow me to my fellow bloggers & meet them! (They're listed on my side bar.) They are so super talented it's just a matter of time before I'm in the board room getting fired! But in the meantime, I'm going to learn all I can from them- especially coloring with Copics. I'm still a newbie, but one day I hope to join the Colorista ranks. Ahhhh, sweet dreamin'---
Gotta Go!

The 411
Stamps: Teacher Anya- The Greeting Farm, Hardwood floor Digi Stamp -Michelle Bartnett
Ink: Memento Tuxedo Black
Paper: Close to Cocoa-SU!, White, black, kraft, cream-K&Co
Other: Copics, white gel -inkssentials, sticker


Tuesday, July 28, 2009

Onesie Bouquet


Hi friends,
This is a onesie bouquet for a friend's shower. Since she doesn't (want to) know if she's having a boy or girl, I used light green. The paint can is decorated with patterned paper, baby specialty paper (laser cut), and
foil stickers. I scattered little flowers throughout & cut out little leaves from the scrap piece I used for the paint can. I didn't add any glitter to these so she could use the onesies when the baby arrives. It's simply created by rolling up the onesies & folding them in half to create 2 "buds." I first saw this idea on Lauren's blog a long time ago. I make these for every baby shower because they are super cute & easy to do. Just in case, this is what onesies are:Thanks so much for peeking at my little project today. I have a couple of friends with new babies so I've got baby projects to work on---Gotta go!

Monday, July 27, 2009

Flip Flop Fun

Hi friends,
Today I have a card I made for SCS Fan Club July Theme. Being part of the Fan Club is awesome! The work these ladies post is breathtaking- just AMAZING! But to be part you have to become a member, more on that in a bit... let's get on with the deets:

I took inspiration from my own sandal. I have a few pairs that I live in during the summer. They are so comfy like your favorite pair of jeans & T-shirt. I added the little footprint mark that your foot leaves while you're breaking them in. I know it looks like this sandal is two sizes too large! but this was version 1 in my playing around :) When I make the next one, I'll be more aware of piggie placement! I made the toes with eyeshadow applicators- just pat down. The rest of the foot was made by creating a shadow around the flip flop. I added a smudge of ink at the heel.

See, it is a card. I created the base card with the Sizzix
Sandal die. I cut another piece, trimmed a little around it, embellished it, & layered it on top.
Here's a closer look at the little piggies:


Here's the back:I cut another sandal & ran it through my crimper (that's what my sandal looks like.) Then, I ran my ink pad around it to "dirty it" up. What do you think that pink part is? Yup! It's a wad of gum! I know those things always seem to find me :( Trash can, people. Trash can!

Thanks for peeking at my card today & for you, friends, who take the time to leave a comment. If you're thinking of being part of the SCS Fan Club, you can find the deets here. I'm off to work on baby stuff- not for me! (We've closed the factory and the workers were dismissed. wink ;) But a couple of my friends are just getting started-- Gotta go!


The 411
Paper: Crushed Curry, So Saffron- SU!, White, Pink- Coredinations
Ink: So Saffron- SU!, Chestnut Roan- Color Box
Other: Sizzix Sandal Die, Crimper, Crop-a-dile, Prima Flower, Rhinestones- Me & my big ideas, ribbon

Saturday, July 25, 2009

Papertrey Ink Blog Hop-July

Hi friends,
Today I'm participating in PTI's Blog Hop! Mission: Text Integration. Oooh, tough assignment since I don't have those PTI stamps in my stash. I'm sure after I see what you have created, I'll have to add those
to my list! Well, let's get on with the deets, shall we...

Here's my card:
I used the Cuttlebug Script Embossing Folder as the background image. I was going for a love letter of days of old- kind of look. I tore the edges & inked around them and rubbed the ink pad over the embossed script.

Here's a closer look at the beautiful bloom:

I stamped it 3 times (with vintage cream on scarlet jewel), cut it out, & layered it with foam tape in between. (luuuuv this stamp set!) It kinda looks like an orchid to me. Maybe because I love orchids & I want it to look like that!

Here's a side view of the layers:

I think Scarlet Jewel & Ripe Avocado are a knockout color combo! The sentiment "It's been too long" comes from the Everyday Button Bits set. I punched it out with the word window punch.

Mission Status: Complete

BUT...do you think this was mission accomplished? I sure hope you do! Thanks for hopping by! I'm off to a new mission-- find my paper snips under all this craft mess!-- Gotta go!


The 411
Stamps: In Bloom, Everyday Button Bits- PTI
Paper: Cream, Scarlet Jewel, Ripe Avocado- PTI
Ink: Chestnut Roan- Colorbox, Vintage Cream, Ripe Avocado- PTI
Other: Cuttlebug, Embossing Folder: Script, word window punch- SU!, ribbon

Friday, July 24, 2009

MOJO96 Sending You Some Sunshine

Hi friends,
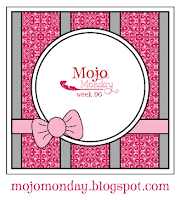
This is the card I created with this week's MOJO Sketch challenge. This came together pretty quickly. I cut out 3 circles, inked them, & added ribbon strips to the back of the largest one so that it looks like the rays of sunshine.

It's one hot summer here in southern Cali, so I hope you're cool wherever you are! Thanks so much for peekin' in today! I'm off to relax by the pool with a good book & a cool drink---Gotta go!


The 411
Stamps: Lily at the Beach- Pink Cat Studio
Paper: White, More Mustard, So Saffron, Pumpkin Pie- SU!
Ink: More Mustard, So Saffron, Pumpkin Pie- SU!, Pool-Pinecone Press
Other: ribbon

Thursday, July 23, 2009

Zoo Time! SC238


Hi friends,
This card is for the SCS sketch challenge for this week. You know me, I love sketches. It revs up my creative juices! I'm going to sneak this card in the mailbox addressed to my boys. Inside will be the deets to our trip next month to the San Diego Zoo & Wild Animal Park. I love San Diego---I could so live there!

The "ZOO" was stamped with a cute animal stamp. All the letters are created with an animal. Like in my card, the Z is created with a zebra, the O's are otters. And best of all, it was on clearance at Michaels for only $4.97! I luuuuv this paper too. It's from the Safari Chic Stack from DCWV. This card came together speedy quick!

Thanks for peeking at my wild card! I'm off to eat some sweet, cool watermelon! Yuuum---Gotta go!

The 411
Stamps: Actopus to Zelephant --K&Company
Ink: Black
Paper: Safari chic-DCWV, cream, black
Tools: Square, square scallop punches- Paper Shapers by EK Success

Wednesday, July 22, 2009

A Surfer Wedding

Hi friends,
Today I have this wedding card to share with you. My hubby asked me to make a card for friends of his who are big time s
urfers. They are getting married next week (in Hawaii). I excitedly whipped out my wedding cake die, but my hubby said "I was thinking of maybe something with a surfer feel since they're both really into surfing." Mojo killer. I was so excited to use my wedding cake die, had all these ideas spinning in my head--- but no. Anyhoo, this is what I created for them:
I made a surfboard template & traced 2 on swirly pearlized paper. Used a (new) embossing folder for the background (sneak peek time!)


added the congrats in a little pearl letters.


I added real sand to the bottom layers that I tore out of cardstock. I tried to make the leashes come around to form a heart with the two "rings" at the ends.


Kept the inside simple. The right hand edge has a wave border. The title on the left looks much better in person. I cut that out with the Storybook Cartridge (luuuuv) on my Cricut.
The base card is made from Shimmer White Cardstock from PTI. I tried to make an untraditional wedding card with traditional elements (white, pearls, ribbon) so I hope they (and you) like it.

Thanks for peekin' in today! I'm off to clean up my craft area-- Gotta go!

Tuesday, July 21, 2009

MFTSC90 We're in this Together

Hi friends,
I finally got a chance to participate in My Favorite Things' Sketch Challenge. I inked up the very first stamp set I bought from MFT called Think Pink. It's a cause that's near & dear to my heart. My mom was diagnosed with breast cancer when I was about 7 years old. Fortunately, they found it at a very early stage & it was successfully treated. I love the quote on the ribbon. It reads "Once you choose hope, anything is possible." by Christopher Reeve. So today, I dedicate this card to those who bravely fight this disease & to those who have lost loved ones. We are in this together, no matter where you are across the country or the world. Because every woman is someone's mother, wife, sister, daughter, friend---loved. And one woman lost to this disease is one too many.

Thank you, friends, for taking the time to visit today... so glad you did!


The 411
Stamps: Think Pink- My Favorite Things
Ink: Pretty in Pink- SU!
Paper: LilyKate- BasicGrey, Jolie Chocolat- SEI, White
Tools: Border Punch: Martha Stewart
Other: Ribbons

Monday, July 20, 2009

In the mood for another Cupcake?

Hi friends,
Today I have this cupcake card to share with you. It's one of the new Sizzix Bigz XL Dies. I think it could be made into a cupcake or ice cream cone! Let's get on with the deets shall we...

It's two pieces: the pocket & the cupcake part which makes up the card.
You also get a cherry & a candle in the die.
I cut out the cupcake with the same confetti paper left over from the 3D cupcake (here). I scored the lines with my scor-pal & used a sanding block to reveal some of the white core.

Here's a closer look at the cupcake:
I punched out the pink dots from a scrap piece & popped them up with mini pop dots. I tied the ribbon around to finish it up. Cute huh! I thought of different ways to create the card (other than the pocket), but I'll need a little more play time! I bought it at Sizzix.com as a "Tuesday Teaser." Basically, if you sign up on their e-mail list, every Tuesday, Sizzix sends you an e-mail about Tuesday only sales & promotions. There are some good buys to be had, for sure! Oh, and before I forget, yes, it fits in a standard A2 card size envelope.

Thanks for peekin' at my card today! So glad you did :) I'm off to play a bit... after all, you know what happens to "all work & no play", right?--- Gotta go!


Blog Widget by LinkWithin