Thursday, June 10, 2010

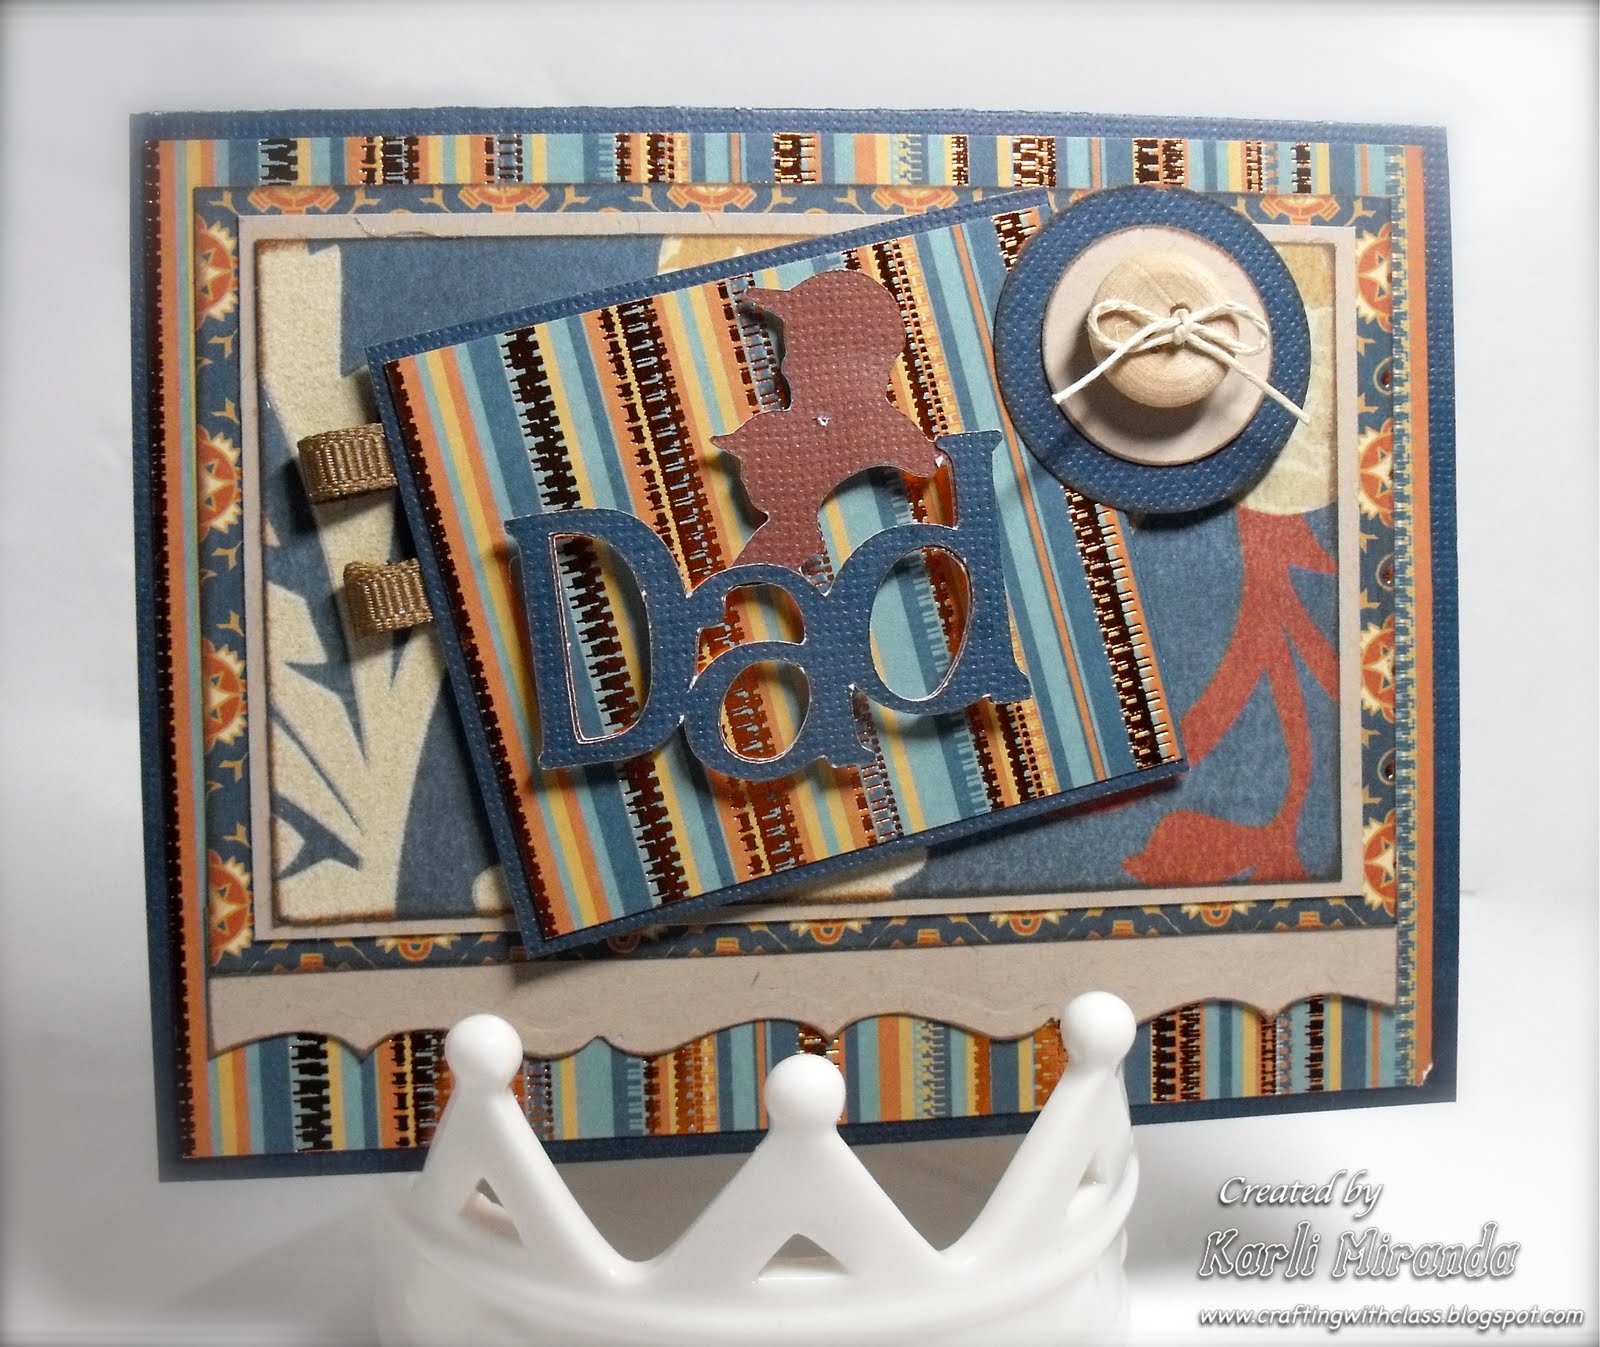
DT: For Dad Mojo 142

Hi there friends,
Today I have a Father's Day card that may go to my hubby or my FIL. Don't know yet. Usually, I make a few & have my boys pick out which one Dad gets & which one Pa Pa gets. Anyhoo, here it is:
The Deets:
All of the DP I used on this card came from the Monrovia Collection by SEI. This is my go-to guy stack. They're cardstock weight papers *perfect* for masculine projects. The papers are gorgeous (as all SEI are in my opinion :) They're foiled & flocked which adds the perfect touch of texture & shimmer without being glittery or girly. I used 4 of the papers in this collection & I think they go very well together. I also used my beloved Gypsy to weld the image & the letters together on my Cricut. I used the A Child's Year cart (luuuuuuuv) for the image & the font.

I enlisted the help of the Mojo Monday Sketch #142 for my card:
Thanks so much for peeking! Don't forget you can find the supplies used for this card (on sale!) at the YMH Store---> HERE.
Gotta Go!

Tuesday, June 8, 2010

Teacher's Lunch Box

Hi ya friends,
Today I'm sharing the end of the year gift I made for Jordan's teacher.
Here it is:
It's the lunch box, book, and apples.
So let's give ya the deets to each one.

The Lunchbox:
I created this lunch box using Lauren's template "Let's Do Lunch". I bought it a while back, but hadn't made anything with it. I did a ribbon treatment to the front & adhered an apple button to it.

Next up are the apple cards.
I cut these out on my Cricut & adhered the gift cards with removable glue dots. I stamped the sentiments & added a simple bow---> eeeeeeeasy!

Here is the book:
I created this to look like a book. And inside, the gift card is tucked in.
The Deets:
Box:
Start with a sheet of paper 7 1/4" x 5 1/4"
Score the long side at: 3/4", 3 1/4", 4", 6 1/2" 
Score 3/4" on all 4 sides (2 of the sides will have already been done)
Assemble your box.

Book Cover: 
Paper 6 3/8" x 4 3/8"
Score the long side at: 2 7/8" & 3 5/8" (this creates the spine)
Embellish as you'd like :)
 Here they are nicely tucked in.

So what do you get a teacher for the end of the year? It depends on the teacher! Typically for the end of the year, I like giving (and getting ;) gift cards. GCs are a good way to go. You should probably avoid things like mugs (you can only have so many mugs!), or knick knacks/decorations.
I know what I appreciate (even more than GCs) is when a parent writes me a letter to let me know that they appreciated my hard work. I keep those and look at them when I start to feel that I went into the wrong profession! they keep me hangin' on just a little longer :) I love when they bring me fresh flowers from their gardens. So you don't have to spend tons on a gift for teacher appreciation for a teacher to feel appreciated.

Thanks so much for peeking! To see more ideas, click on the TEACHER RESOURCES link in the sidebar :)
Gotta Go!

Monday, June 7, 2010

Summer Fun Mini-Album

Hi friends,
I'm finishing up my son's Teacher Appreciation/End of the year gift so I'll be sharing that soon. But today, I thought I would share a really cute summer mini-album made with Pine Cone Press kit/papers.
Here it is:
It has loads of Stickles for sparkle. It's a little 6x6 Mini-album, but you won't believe how many pics it will hold :)

Here's the album open:
The left side has room for a pic. The right has a pocket with a tag ready for another pic or journaling.

Swing out the right page & you'll see this:
more room for pics/journaling.

Flip the middle top up & you'll see this:
uh huh---> more room for pics.

Flip the bottom center down & you'll see this:
Yuppers... more panels for pics!

But wait! There's more... the sides explode open to give even more space.
right side:

left side:

This was a really fun book to make! Now I'm ready for summer to begin & get going filling this book with pics of my boys :)

Thanks so much for peeking today! This is my last week with my school kiddos which means I'll be supah dupah busy closing out the year. And if you think you've seen the last of projects made with the Sizzix Ball Die, you're in for a surprise!---> just sayin' ;)
Gotta Go!

Friday, June 4, 2010

Watch out for that...

Howdy friends,
I have another project to go with this week's theme. Know what it is yet???
Here's the card front:
This is Hula Anya colored with Copics. She's so cuuute! Love how she's working the coconut bra!
I used this Club Anya & Friends Sketch:
And when you open it...

POP goes the coconut!
Mmmmm, I LUUUUV coconut! The kind you get from the tropics is sooo yummy! And as an official coconut connoisseur, let me tell you that not all coconuts are the same.

Again, I used the Sizzix Ball die. I cut the main parts out of coconut bark (aka brown textured cardstock) & only the top piece in white for the coconut meat & left a bit of that showing. Popped in a straw I trimmed to fit inside (sorry, I only had blue straws) & a little umbrella & we're ready to Luau! The umbrella would have to come out when closing the card, but the straw will tuck in there nicely :)
Here are a few more peeks:
I cut out the letters with my Cricut using the Life's a Beach cart. This is such a cute font :) This card is just callin' me & reminding me that summer vacation is almost here. I've just got to hang for 1 more week :) then I get to bust out MY coconut bra! ewww, just kidding ;)

Fun Fact: Falling coconuts kill 150 people every year which is 10 times the number of people killed by sharks. Now you're one step closer for that Jeopardy championship :)

Thanks for popping in today. I'm off to eat some coconut gelato!
Gotta Go!


The 411
Stamps: Hula Anya- The Greeting Farm
Ink: Memento black, Chestnut Roan
Paper: Choc Chip, Very Vanilla- SU!, Mango Luau- BoBunny
Accs: Sizzix Ball Die, flower punch- EK Success, Bridal Flower Confetti- Michaels, Flower Card EF- Quickcuts, Cricut- Life is a Beach cart, Oval Nesties, Copics

Thursday, June 3, 2010

DT- Hey there, Chickadee

Hi friends,
Here's a sweet little card using one of my fav techniques: paper piecing.
 Sometimes, I don't feel like coloring an image so I'll paper piece. It's a great way to "color" your stamps & add pops of colors & patterns to your stamped images.

For this card, I used a smidgen of DP from the Bridgeport Collection from SEI. I stamped the cute birdie Snag 'em stamp on 3 different papers & cut them out. I stamped again & cut out just the belly & the wing & mixed the DP for more contrast on each birdie.  Very simple :) I added a Prima Mini-Rose which went perfectly with the colors of the DP.

All these goodies can be found at the YMH Store---> HERE. Thanks so much for peeking!
I have one more post coming up to continue this week's theme... do you know what it is???
Gotta Go!

Cinema Saturday Challenge- Ferris Bueller's Day Off

Hi friends!
Today I'm starting with a card I created for this week's Cinema Saturday Creative Challenge of the film:
I watched this movie like 100 times (and no, that's not me being dramatic... as I usually am :) I think I HAVE watched it 100 times --- especially the scene that inspired my card.
Here it is:
One of my most fav scenes was when Ferris was in the parade singing "Twist & Shout" and I LOVED the dance within that number. Yes, I still know all the steps! "It's so choice" is one of my FAV lines ever. It comes from the scene where he's describing the awesomeness of the car. This movie is a classic! Matthew Broderick is perfect and the whole cast is amazing. There are WAAAAAAAAAY too many scenes & lines from this movie that I love.

I used my Gypsy & Cricut to cut out the vest & T-shirt. The sentiment is computer generated.
I've got a couple more posts coming today, so hopefully, you can POP back as this week's theme continues :)

Thanks for peeking and SAVE FERRIS!!!

Wednesday, June 2, 2010

Pop & Circumstance

Hi friends,
Thanks so much on your comments for yesterday's apple pop-up card. It was quite easy to do :) but today's card... well... not so much! You'll see what I mean...
Wanna peek?
Here's the cover:
And when you open it...

Out pops... the GRADUATE!
This was not the card I was going to share today, actually. But this idea popped into my head this morning while I was getting ready for school. So I came home & tried to create what I had pictured in my head before it was gone forever ---> you know, to the place where all the "don't forget" things go. ;)

For the graduate, I also used the Sizzix Ball Die. I cut the flesh toned pieces & assembled them as you normally would. Then I die cut the hair (brown) & ran it through the CB D'vine swirls EF to give this guy some swirly curls.

Here's a side peek:
See those curly locks! BTW, the reason why this turns is because I added an extra piece underneath him so that his head could spin around (kinda like the exorcist--- but no projectile pea soup & scariness!!! hee!) To make his cap, I cut another layer in black & cut those pieces then I cut out a square for the mortarboard which I adhered to the top with foam adhesive.

Here's a peek at the back:
I know his hair in the back is uneven :) but this is probably how it WOULD look if I cut hair!!! (hee!) ---> keepin' it real, ya know!

A peek from above:
The "congrats" behind him was cut with my Gypsy (luuuuv!) Then I added some googly eyes & bad pen work for the face features (will have to work on that!) and I made the tassel with some embroidery floss.

So this project qualifies for the same challenges as my apple card. Here they are again:
I used the square version of the fab sketch from Mojo Monday #141.

And...... for Just Us Girls ---> dry embossing: his hair for curls


And if you've stuck this far, you get a gold star! So have you guessed the theme for this week yet??? Remember, there may be a POP quiz later... I'm just saying :)


Thanks so much for peeking today! Hope you like my grad guy:) and if there's a grad guy... then you know there can't be a grad girl too far behind ;)
Gotta Go!

Blog Widget by LinkWithin