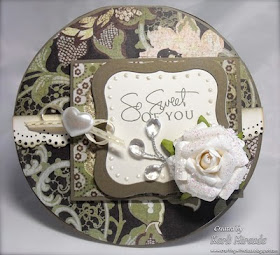
Hi friends,
It's the 30th of December which means the New Year is just around the corner and there's a brand spankin' new sketch from Cardabilities coming your way!
Here's the last sketch of the year for ya:
Here's my card:
Are you glad it's not a Christmas card ;) I thought I'd start on V day cards & this one *might* go to the hubby. The DP is Bo Bunny Crush Collection (cuuute:)
Here's a closer peek at the embellie:
I layered circles on a medallion, then added a punched heart (MS), tied a ribbon in the lattice, & passed a Maya Road pin through it decked out with pearls. The "V" has red glitter on it.
Please be sure to stop by the Cardabilities blog to check out the awesome work the rest of the DT has created to sketchspire ya! Hope you can play along with us using this great sketch so be sure to linky it up by January 14th. There are some really exciting things happening at Cardabilities for the month of January, you are NOT going to want to miss!
Just in case I don't post again until next year ;) I hope you have a terrific and safe time ringing in the new year! Hope 2011 is the best year yet!!!
Thanks so much for peeking today & Big Hugs to ya!
Thursday, December 30, 2010
Wednesday, December 29, 2010
My Top Ten Cards Blog Hop
Hi there friends,
While visiting Shelly's blog, I saw that she was participating in a blog hop featuring your own top 10 cards of the year. I thought it was a fun idea & a great way to recap the year. So... I'm in!!!!
Here are the 10 cards I chose to highlight:
#1: Tissue flowers for the PTI Blog Hop
#2 Mojo Monday Sketch
#3 Firecracker Designs & Mojo Monday
#4 City Crafter Guest Designer Card
#5 Cardabilities
#6 Cardabilities
#7: Kleenex Box Pop-up Card
#8 Pop-up Apple
#9 Mojo Monday& CC Designs
#10 Magnolia: Loving Bridal Couple
(Remember I said I thought she looked preggers... well, in the next collection there was Baby Tilda!)
Aaaaand these are my top 3 projects:
Teacher's Lunch Box
Back Pack & Pencil
Teepee for Tilda
It was so fun to look back at the cards & projects I created over the year. I'm sure this is something I'd like to do again :) Hope you enjoyed a walk through my top 10 cards & projects with me!
You can find all the deets to the hop----> Here.
Thanks so much for peeking!
Gotta Go!
While visiting Shelly's blog, I saw that she was participating in a blog hop featuring your own top 10 cards of the year. I thought it was a fun idea & a great way to recap the year. So... I'm in!!!!
Here are the 10 cards I chose to highlight:
#1: Tissue flowers for the PTI Blog Hop
#2 Mojo Monday Sketch
#3 Firecracker Designs & Mojo Monday
#4 City Crafter Guest Designer Card
#6 Cardabilities
#7: Kleenex Box Pop-up Card
#8 Pop-up Apple
#9 Mojo Monday& CC Designs
#10 Magnolia: Loving Bridal Couple
(Remember I said I thought she looked preggers... well, in the next collection there was Baby Tilda!)
Aaaaand these are my top 3 projects:
Teacher's Lunch Box
Back Pack & Pencil
Teepee for Tilda
It was so fun to look back at the cards & projects I created over the year. I'm sure this is something I'd like to do again :) Hope you enjoyed a walk through my top 10 cards & projects with me!
You can find all the deets to the hop----> Here.
Thanks so much for peeking!
Gotta Go!
Tuesday, December 28, 2010
A Cinderella Christmas
Hello friends,
Hope you had a great holiday :) My boys took off for the bay area for a few days so I was left home all by my little lonesome... HOOOOOORAY! I love my boys, but it's so awesome to have some "just me" time! Wake up when I want, clean up & IT STAYS CLEAN!, don't have to cook, & get into just a little bit of mischief ;) Ahhhhh...
So here are the last of my Christmas cards for this year. I made them at the last minute- shocker, I know! ;)
This was an ornament card- really simple
And easiest of all was this one:
Just embossed the base card & wrapped a ribbon around it. Could not be easier :)
Thanks so much for peeking today! My boys are on their way back which means I hear the clock strike midnight at the ball... I've had on my own for the past few days :) Tee! Hee!
Gotta Go!
Hope you had a great holiday :) My boys took off for the bay area for a few days so I was left home all by my little lonesome... HOOOOOORAY! I love my boys, but it's so awesome to have some "just me" time! Wake up when I want, clean up & IT STAYS CLEAN!, don't have to cook, & get into just a little bit of mischief ;) Ahhhhh...
So here are the last of my Christmas cards for this year. I made them at the last minute- shocker, I know! ;)
And easiest of all was this one:
Just embossed the base card & wrapped a ribbon around it. Could not be easier :)
Thanks so much for peeking today! My boys are on their way back which means I hear the clock strike midnight at the ball... I've had on my own for the past few days :) Tee! Hee!
Gotta Go!
Friday, December 24, 2010
Merry Christmas!!!
Hello to all my friends near and far!
I wanted to wish everyone a wonderful & joyful Christmas & the happiest of holidays! Thank you for popping in to my little blog corner of the universe & for blessing me with such heartfelt comments. You have no idea how much I appreciate your kindness :)
To my glitter bee sisters- muah- big hugs to each & every one of you! You are all so special and make everyday feel like the love of Christmas time :)
Enjoy where you are, don't let this time of year stress you out! (and I am totally saying that to myself right now, by the way!)
I'm off to buy my last 2 gifts on my list & unfortunately that means I'll be taking my life into my own hands as I head to that 4 letter word---> MALL! :{ ugh! Ok, y'all. I'm going in! Wish me luck ;) Hopefully I'll make it out to blog another day!
BIG, big hugs to ya!
Wednesday, December 22, 2010
Dreaming of a ...
Hello there friends,
So all the decorations are up, the house received the Mary Poppins treatment, all the Christmas shopping is done, and all the gifts are wrapped! Umm... then I woke up! I haven't done any of those, ugh ;( but it all begins with a dream right?!
Anyhoo, here are a couple more cards I managed to get done:
I just love that sentiment "A snowflake is winter's butterfly."
Hope you've been much more productive than I've been :) But this is "vacation" time so that's what I did for the last few days! Now, time to work on that dream...
Thanks so much for peeking today!
Gotta Go!
So all the decorations are up, the house received the Mary Poppins treatment, all the Christmas shopping is done, and all the gifts are wrapped! Umm... then I woke up! I haven't done any of those, ugh ;( but it all begins with a dream right?!
Anyhoo, here are a couple more cards I managed to get done:
I used snowflakes to create the tree & added pearls for ornaments. I really like how it came out even though I had no idea what I was doing at the time!
Here's the second:I just love that sentiment "A snowflake is winter's butterfly."
Hope you've been much more productive than I've been :) But this is "vacation" time so that's what I did for the last few days! Now, time to work on that dream...
Thanks so much for peeking today!
Gotta Go!
Monday, December 20, 2010
Treat Box Tut: Take Two
Hi friends,
So sorry for the delay of this tut. It's been crazy busy on the home front, I can't even tell you! :(
Here's the tut for the godiva inspired box- a la Cricut!
Here's the final product:
The deets: (feel free to click on any pic for a closer peek :)
First, I cut out 3 pockets using the crayon box from the Bags, Tags, Boxes & more cart. I was able to put 2 on my 12 x 12 mat (on my Gypsy). The pockets were set at W 7.95 x H 6.06 to maximize the size. (Note: I also hide/contoured the inner holes so they would not be cut out).
Here's what they'll look like unassembled:
Now cut off the small end tabs & the box lid:
So you'll just have this left:
I ran mine through my CB Snowflake Embossing folder, added adhesive to the end tab, & assembled my box:
Do that to all three & set aside.
Now for the wrap:
You'll need a sheet that's 12" x 4" and a coordinating sheet that's 6" x 4"
Scoring:
along the 12" side you'll score at 4 1/4" and 5 3/4
and on the 6" side (6" x 4" paper) , score at 1" and 2 1/2"
Add adhesive to the left of the 1" score line (I flipped the sheet over)
& adhere that to the long end of the 12" sheet to make one long piece. Fold on the score lines.
Now take your crayon boxes & add strong adhesive to the bottoms:
Adhere all the 3 boxes to the middle space of the wrap:
Wrap a piece of ribbon around the front of the box. This will serve to decorate it as well as to hold the front tab in & secure the box.
In the pockets, I added a cocoa packet, tea bags, & a homemade cookie :)
To finish, just tuck the front tab behind the ribbon & finish embellishing it. As you can see, this is a project where using double-sided paper is a plus!
Here's the finished box again:
For the easiest version- no cricut required- see this post---> Here.
I do have one more version coming up!
Thanks so much for peeking!
Gotta Go!
Blog hop candy winner
Hi friends,
My blog hop candy winner is #27
Thank you everyone for your comments! Scrapping mom, please email your snail mail & I'll get your candy out to ya!
My blog hop candy winner is #27
- scrappingmom73 said...
- What a great gift idea!!
Thank you everyone for your comments! Scrapping mom, please email your snail mail & I'll get your candy out to ya!
Wednesday, December 15, 2010
Cardabilities sketch 17 DT Reveal
Hi friends,
Welcome to another great, brand spankin' new Cardabilities sketch reveal :) This was a really fun sketch to work with as I don't think I've done banners on my cards before.
Here's sketch 17 for ya:
My card: "Here's looking at you, kid"
I punched out circles to create the snowman & layered each circle with dimensionals. The papers are Figgy Pudding by Basic Grey on Aqua Mist & Hawaiian Shores cardstock (PTI.) I used the banner die from My Favorite Things to create the pennants.
Here's a closer peek:
I used bitty stickers for the "Let it" & then went over it with my Viva Decor Glitter liner. I used mini pearls to spell out "SNOW." I thought the little pearls looked like little snowballs :)
We would love for you to join us on this fun sketch! You've got till the 29th! Please hop on over to the Cardabilities blog & check out the fabulous ideas the DT created with this sketch.
Thanks so much for peeking today.
Gotta Go!